Sunday, December 29, 2013

Mi amor and Little Gold Dress review!

Hey Sensationailers!

Sorry for the haitus! I knew my mom was sending me some sensationail as a gift but it was lost in the mail for over a MONTH! But all is well now! And of course, like many of you, I couldn't wait to remove the old and put some new polish on! My old mani was disco fever tips with a Sugar Plum star/snowflake for Christmas 

I settled on this after many attempts with different nails stickers like this:
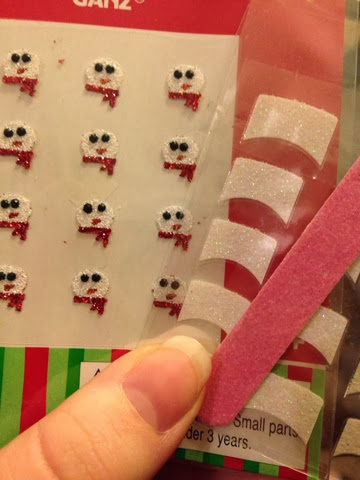
And this:


I LOVE the stickers, but I just couldn't get them to stay for the life of me. I think I'm going to stay away from any nail accessories bigger than a rhinestone because the always pop off for me. Some people have used nail glue to get them to stay on, but personally, I would rather try to work on my nail art technique. I've been looking into Winstonia nail brushes, if anyone has any input, please comment! :) 

My new mani is:

I tried to give a couple variations of lighting so you could see the difference. I love both of these colors. Mi amor is the peachy-pink color. The box is a little deceiving, as the color looks a little more pink, but it is a delightful peach color! It's refreshing after all of the silver and red I've been using for the holidays. The accent nail is "Little Gold Dress" and I am equally in love with this color! It has a nice shimmer to it and is the perfect gold color for all of your New Years festivities, if you are looking for anything too flashy! I hope this review and pictures help! Any questions or comments, just comment below! :) 

P.s. The Henna is done by hennani.co.uk (Instagram - @hennanorthernireland, twitter - @hennanorniron) such an amazing artist and a nice relaxing experience! If you live in the Belfast area, look her up! 

Grace x 


Saturday, December 7, 2013

First Winter Mani!

Hello Sensationail-ers!

Sorry for the long absence! School and job hunting takes up a ton of my time, plus the 2 weeks I get out of wearing sensationail! 

     This week, I decided to try something new - a sponge-gradient look. I have never done anything like this, but I'm pretty sure it's my new favorite nail look! It is actually very simple and the results are stunning!

Okay, first as usual, you want to remove any polish! (I removed mine a few days ago to let my nails breath a bit before applying a new color!) 

Then buff the natural shine off of your nail with the pink side of your buffer 


I had also cut my nails down a bit and filed them to shape them. I can't stand them when they are too long, and I find that they break easier when they are longer. Before sensationail, I always had very brittle nails, and I am a biter! But now they are stronger than ever! 

After you buff, you want to push back your cuticles, then clean your nails with your lint free wipe and gel cleanser:


Once clean, then apply your primer if you want to:


(I'm so mad that I spilled almost the whole bottle after my last mani!) 

The colors I decided to use for this gradient were Pink Chiffon and Disco Fever:


I used Pink Chiffon as a base:


And then I applied a small amount of Disco Fever to the sponge and sponged that onto the tip of my nail:


I applied the Disco Fever with a sponge and then sponged off any extra with a different side of the sponge. I cured this for a full minute, then applied another layer of disco fever, staying more towards the edge of my nail:


Wipe off the excess around your nail with an edge of the lint free wipe and cure for another 60 seconds. Then apply your top coat and voila:


I got the snowflake nail gem from Pound Land. I don't reccomend them. This one stayed on through washing the dishes, but popped right off while I was making the bed... Maybe with nail glue it might stay longer, but it is also bulky. I liked it at first but then became annoyed with it. You might have better luck than I did! I'm just happy I didn't spend a fortune on them!   

I was inspired to do this look after a chilly walk home at sunset. I will definitely be doing more sponge gradients! 

If you have any questions, don't hesitate to ask in the comments section!

Thank you!! 

Grace x 

PS:  www.sensationail.co.uk 4 FOR 3 FLASH SALE!  CLICK ON THE BANNER ON THE SENSATIONAIL HOMEPAGE AND GET 4 POLISHES FOR THE PRICE OF 3!!  INSTEAD OF £50, YOU ONLY PAY £37.50!! GET TWO FOR YOU AND TWO AS A CHRISTMAS GIFT... OR JUST TREAT YOURSELF TO 4 NEW POLISHES!


Monday, November 18, 2013

Christmas Nail-Art ideas!

Hey all! I just wanted to post some cute Christmas nail art ideas! I can't wait to get more colors to try these out! I found them all on Pinterest and I take no credit for them! I hope you enjoy! 


I saved my favorite for last! I really hope that I can do some of these this winter! Winter is one of my favorite seasons!

Enjoy! 


Friday, November 15, 2013

FLASH SALE!! DISCO FEVER!

Hey Sensationail-ers!

FLASH SALE ON DISCO FEVER!

£6!!!


My Disco Fever mani - My FIRST Sensationail.

You can't beat it!  Go buy one now!  :)


Tuesday, November 12, 2013

Autumn mani! Bubbly Champagne!

Autumn is definitely my favorite time of year and here in Northern Ireland, we've had mostly pleasant weather. I thought I would do an end of autumn manicure in one of my favorite neutrals from Sensationail - Bubbly Champagne.  I hope you love this color as much as I do. It is definitely light, but 2-3 light coats should bring this beauty to full opacity! 

Let's get started:

First, take your old polish off.. I was wearing sugar plum with bubbly champagne accents, but it had been almost two weeks - time for a change! 


My setup! I like to have everything handy and ready to go!


1. Buff the shine off of your nails with whatever nail buffer you have. I bought the whole removal kit from sensationail, which came with these foil wraps. They have a little piece of cotton attached that is the perfect size for your nail. They aren't my favorite though, because I feel like you need 5 hands to get them in place and to stay there. But here we go. 

2. Let your nails so for 15-20 minutes then lightly buff off the polish, or use the Sensationail removal tool if you have one. I love mine - it makes removal so much easier and quicker! 

3. Once the polish is off of my nails, I like to put some lotion on them seen here:

I let this soak in while I'm removing polish on the other hand, just to give my nails a little moisture after the acetone.

4. Gently push back your cuticles with the angled stick.

5. Buff your nails a bit with the pink side of your buffer, or any gentle buffer.

6. Take your gel cleanser and lint free wipes:

I only place a small amount of cleanser on the pad:

Like with most sensationail products, a little goes a long way! I like to try to make the cleanser last, rather than soaking the pad in it.

7. Primer. 

Some people like it, some people don't. I apply a little around the edges of my nails. If you're noticing that you're having a hard time removing the polish, you might want to skip the primer all together, or only add a little to the tip of your nails. Sometimes it's trial and error.

8. Base coat:

Place a thin layer of the base coat and cure under your LED lamp for 30 seconds.


I find it easier to cure my thumbs first, then the rest of my fingers - whatever works for you, just make sure to get a proper and full cure.

9. Now place a thin layer of Bubbly Champagne (or whatever color you're using) on your nail and cure for the full 60 seconds.

After one coat:


10. Apply another thin coat of the color polish and cure again for 60 seconds.

After two coats:


11. Apply a thin layer of the base/top coat (clear transparent) and cure your nails for another 30 seconds (or longer just to be safe).

12. Finally, take your gel cleanser and wipe the moisture layer off of your nails with the lint free wipe and voila!


Your own gorgeous, at-home gel manicure!

Review of Bubbly Champagne:

I personally love the color of this polish. It is a little light, but it works for a simple neutral mani. This color works well with Pink Chiffon if you want to get fancy! Again, if you aren't happy with its transparency after 2 coats, put another 3rd thin coat. Don't fret! The color on the box is a little bit misleading, but the color itself is gorgeous! 

If you have any questions, just comment!

Thank you! 

Grace x 


Just a little How-To

I wanted to post a picture of how I apply my gel polish as to avoid getting any polish on my skin and cuticles.  This is the fool proof way!


Maybe it isn't completely fool proof... Sometimes you just get a little polish on your skin.  No worries!  Just wipe it off with the cuticle stick you have.

Hope this helps! 


Monday, November 11, 2013

New Sensationail Blog!


Hello!  Welcome to my new Sensationail Blog!  Here you will find reviews, tips and tricks on how to get your own perfect Sensationail Gel Manicure!  My name is Grace, and I'm just an average 20-something, addicted to doing my nails and someone who wanted a salon-quality manicure in the comfort of my own home.  I have found that and more in Sensationail.  Sensationail is easy to apply, easy to remove and easy to WOW!  I really do love this product and I hope you find this blog useful!  Please leave comments with any questions or concerns that you may have about the product, such as how to apply, how to remove, and what techniques work best or just any comments in general!  I have also left my own personal reviews on all of these colors below on Sensationail.co.uk. Just look for the specific colors and see if the color is for you!  Stay tuned for more to come from Sensationail! x

Disco Fever

Pink Chiffon with Bubbly Champagne Accent

Sugar Plum

Pink Daisy

My Sensationail Setup!